When using Docker, Nginx Proxy Manager provides an easy way to direct domains to various IP addresses and ports while streamlining SSL verification with Let's Encrypt.
To install Nginx Proxy Manager on Docker first follow the official setup guide here. We assume you have already run PrivateRouter's Docker container or command line Reverse Proxy script and are connected.
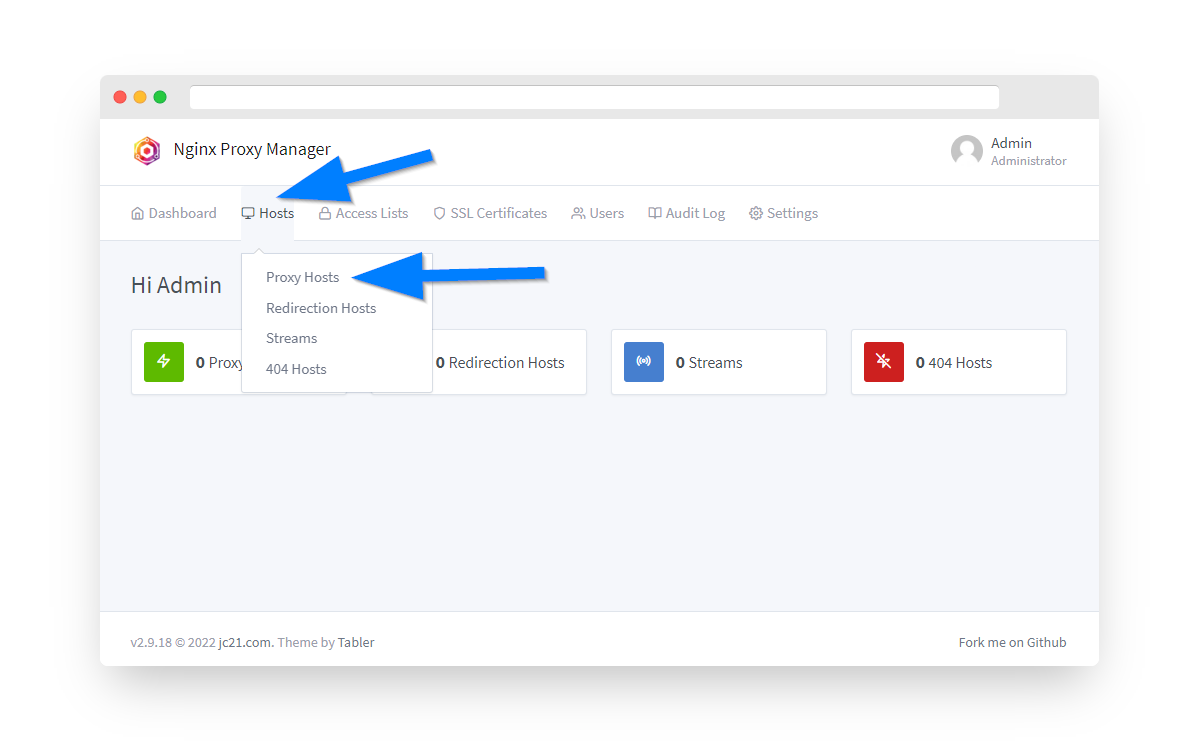
1.) To access Nginx Proxy Manager open a web browser and navigate to your local web hosting IP address on port 81. Once you are logged in click the Hosts menu option then select "Proxy Hosts".
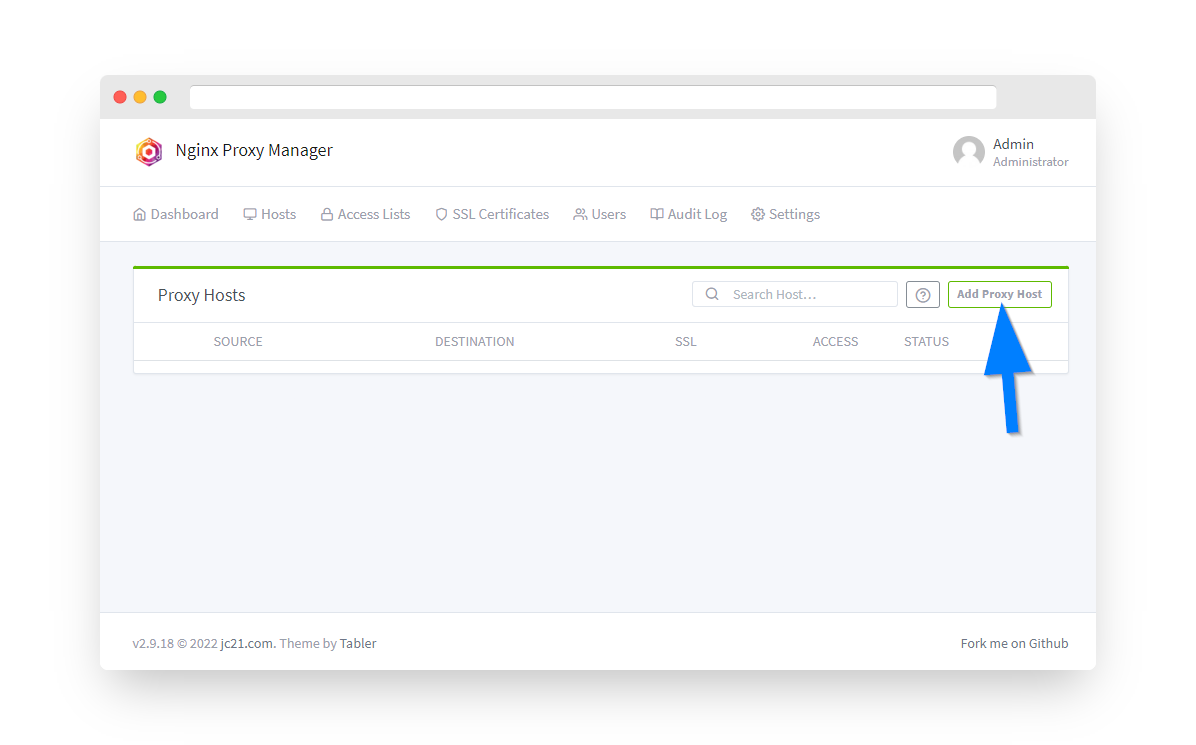
2.) Click the Add Proxy Host button.
3. Before proceeding first make sure you have pointed an A record or A Wildcard record with your domain's registrar at your PrivateRouter reverse proxy IP address. Then enter the domain name or subdomain under Domain Names. Select "https" under Scheme and the enter the web app's IP address and port under Forward Hostname / IP and Forward Port. To ensure you have the correct settings make sure you can access your local web application in a web browser using this same IP address and Port number. Click the Save button.

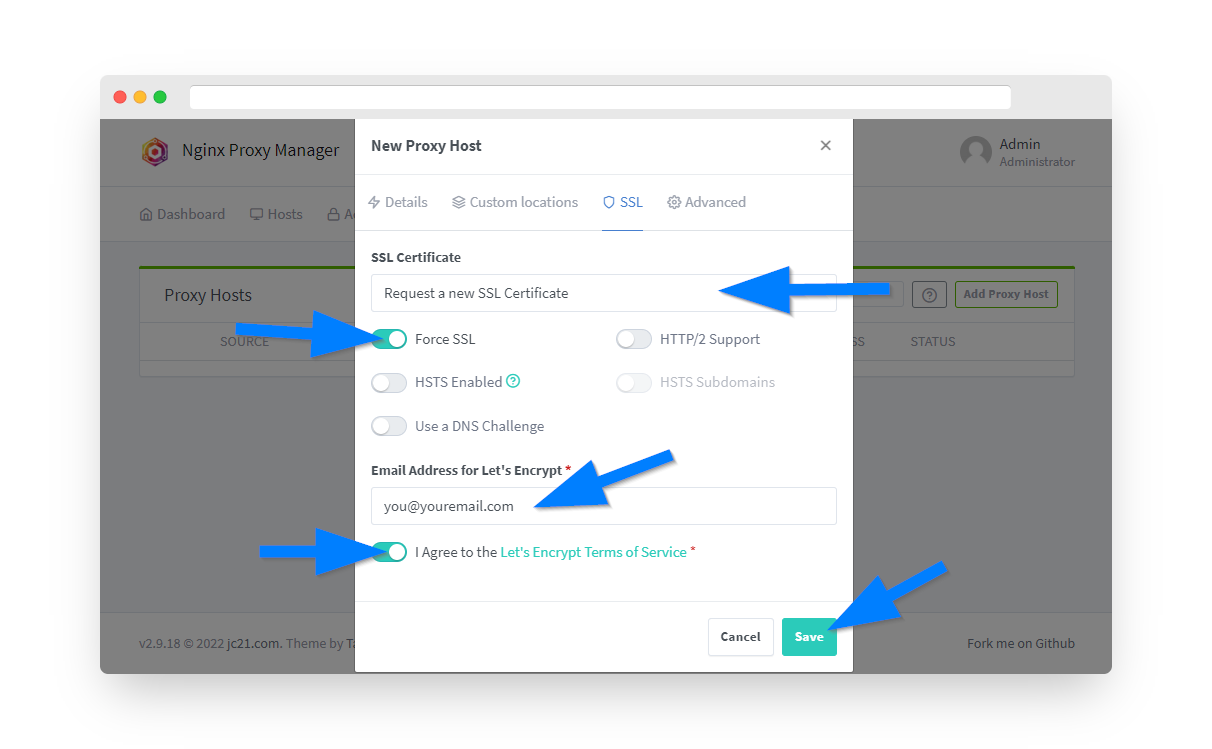
4. Next click the SSL tab to proceed with obtaining a free Let's Encrypt SSL certificate. Under the SSL Certificate dropdown select "Request a new SSL Certificate with Let's Encrypt". Click the "Force SSL" switch and enter an email address to register your SSL cert by with Let's Encrypt. Finally, click the "I Agree" switch on Let's Encrypt Terms and Conditions and click the save button. After a few moments you should see your new proxy host on the Nginx Proxy Manager dashboard with a green "online" status. To verify things are working open a new browser window and enter in your domain name. You should see your local web application is now loading through your domain.